- 1 Introduction
- 1.1 About zentaoPHP
- 1.2 Features
- 1.3 License
- 2 Installation
- 2.1 System Requirement
- 2.2 Install zentaoPHP
- 3 Quick Start
- 3.1 Echo Hello World!
- 3.2 Use MVC to echo Hello World!
- 3.3 Example: Deploy the blog built in zentaoPHP
- 4 Basics
- 4.1 Basic Concepts
- 4.2 Request Types
- 4.3 Create Links
- 4.4 Class: HTML, JS, and CSS
- 5 Advanced
- 5.1 Directory Structure
- 5.2 DAO
- 5.3 Pager Solutions
- 5.4 Data Validation
Example: Deploy the blog built in zentaoPHP
- 2018-07-11 13:32:30
- tengfei
- 9530
- Last edited by tengfei on 2019-09-16 14:10:52
zentaoPHP has a simple blog example. Now let's see how to deploy this example application.
If you have initialized your database, you can skip the first step.
1. Create a database
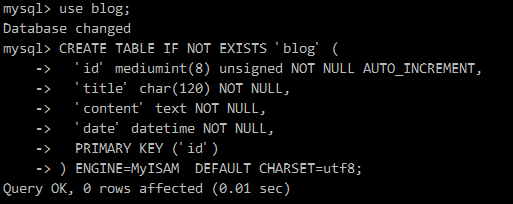
In the directory of db, there is a blog.sql file. This is a very simple table. Use PHPMyAdmin or command lines in MySQL to create a database and name it blog. Then import the tool to create a table from blog.sql.
$> mysql -u root -p
$> create database blog;


2. Create a config file for this blog application
A config.php file has been built in this application, so you can change this file and use it. What we recommend is that you create a my.php file and define the configuration in this file, so to avoid conflicting codes.
Cope config/my.example.php and rename it as my.php. Then change the parameters for the database in it.
$config->debug = true;                    // turn on debug for developing environment
$config->requestType = 'PATH_INFO';       // If mod_rewrite is on in Apache, use it. Or change it to GET
$config->requestFix = '-';                // path separator
$config->webRoot = '/zentaophp/';         // current path to visit in web
$config->db->port = '3306';
$config->db->name = 'blog';
$config->db->user = 'root';
$config->db->password = '';
3. Visit the blog
Go to http://localhost/zentaophp/blog/ and you will see the page.

